Process Correlation
- Former user (Deleted)
- Former user (Deleted)
In this sample, we explore how to use correlation sets to route a message to an existing instance of a business process. We are going to use the simplest possible BPEL process. An Echo Process which accepts the same request message twice. The following is a sequence diagram for the sample scenario:
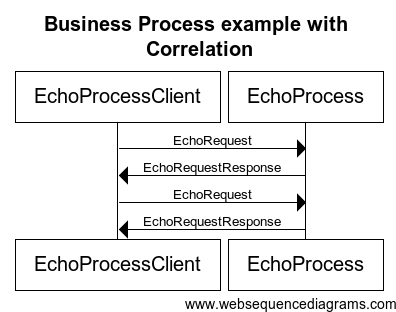
Since the second EchoRequest can either create a new instance of the EchoProcess or be routed to a previously created instance of EchoProcess, we require a correlation set.
Introducing CorrelationSet, Property and Property Alias
A CorrelationSet is a unique set of values contained in the message that is used by the process engine to select the correct process instance to send the message to. Correlation is done between two or more messages. A CorrelationSet can contain one or more properties.
Once we define a correlation property, we have to define the corresponding values in each of the messages we expect to correlate. These corresponding values are called Property Aliases.
Create the Process using WSO2 Developer Studio
- Create the business process. Use the following steps to accomplish this.
- Right-click on the Project Explorer and go to New > Project.
.png?version=1&modificationDate=1378475391000&cacheVersion=1&api=v2&width=750&height=465)
- Clicking project opens the New Project window
.png?version=1&modificationDate=1378475386000&cacheVersion=1&api=v2)
- Click Next and client creates the BPEL project.
- Right-click on the Project Explorer and go to New > Project.
- Generate a business process with the synchronous business process template. Use the following steps to accomplish this.
- Select a wizard from the subsequent screen that appears after creating the BPEL project.
.png?version=1&modificationDate=1378475453000&cacheVersion=1&api=v2)
- Select the New BPEL Process File and click Next.
- In the resulting screen, enter the BPEL Process Name, the Namespace and the Template as shown in the below image.
.png?version=1&modificationDate=1378475501000&cacheVersion=1&api=v2)
- Click Next.
- Create a WSDL file by filling out the Service Name, Port Name, Service Address and Binding Protocol as shown in the following image.
.png?version=1&modificationDate=1378475556000&cacheVersion=1&api=v2)
- Click Next and finish the process. The following screen appears.
- Select a wizard from the subsequent screen that appears after creating the BPEL project.
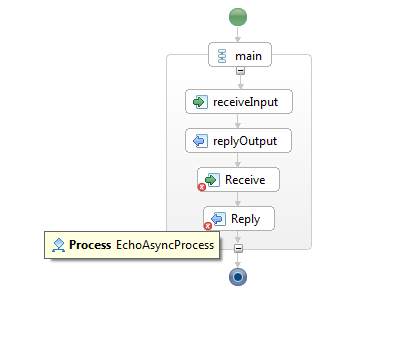
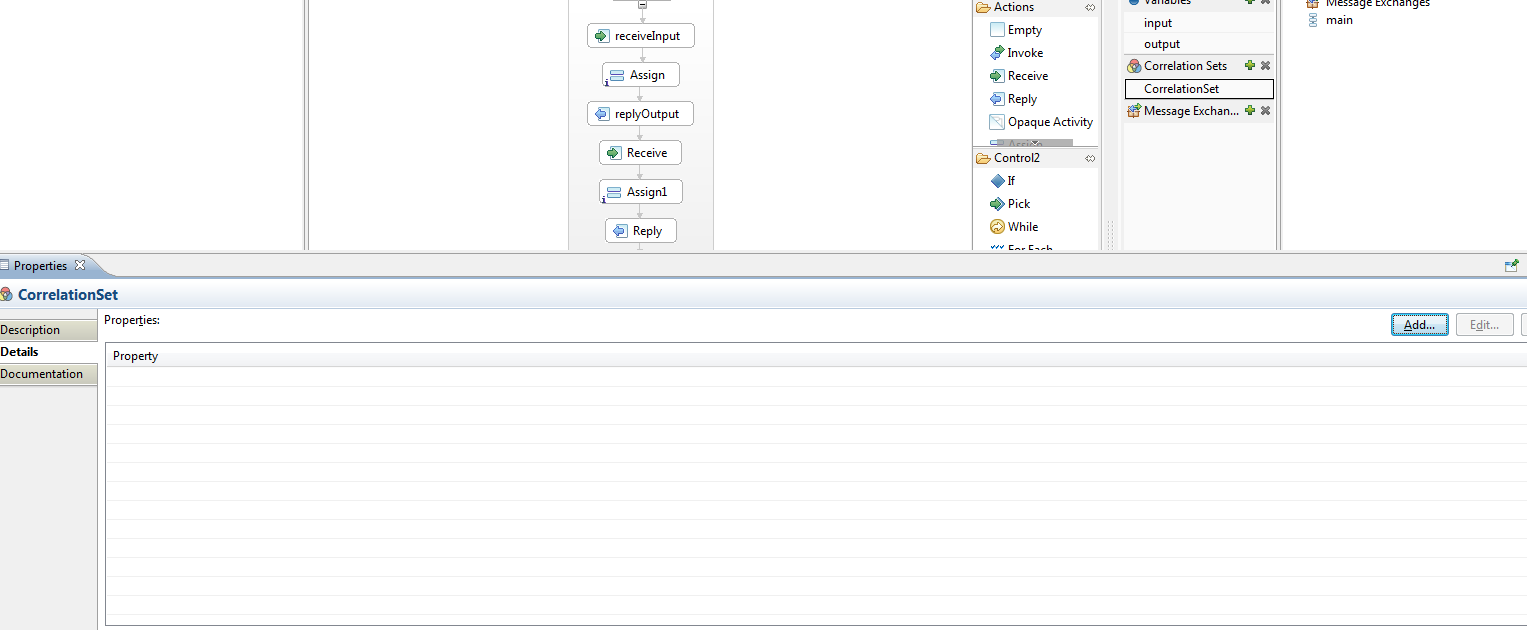
- Drag and drop Receive, Assign and Reply activities such that you get the following process.
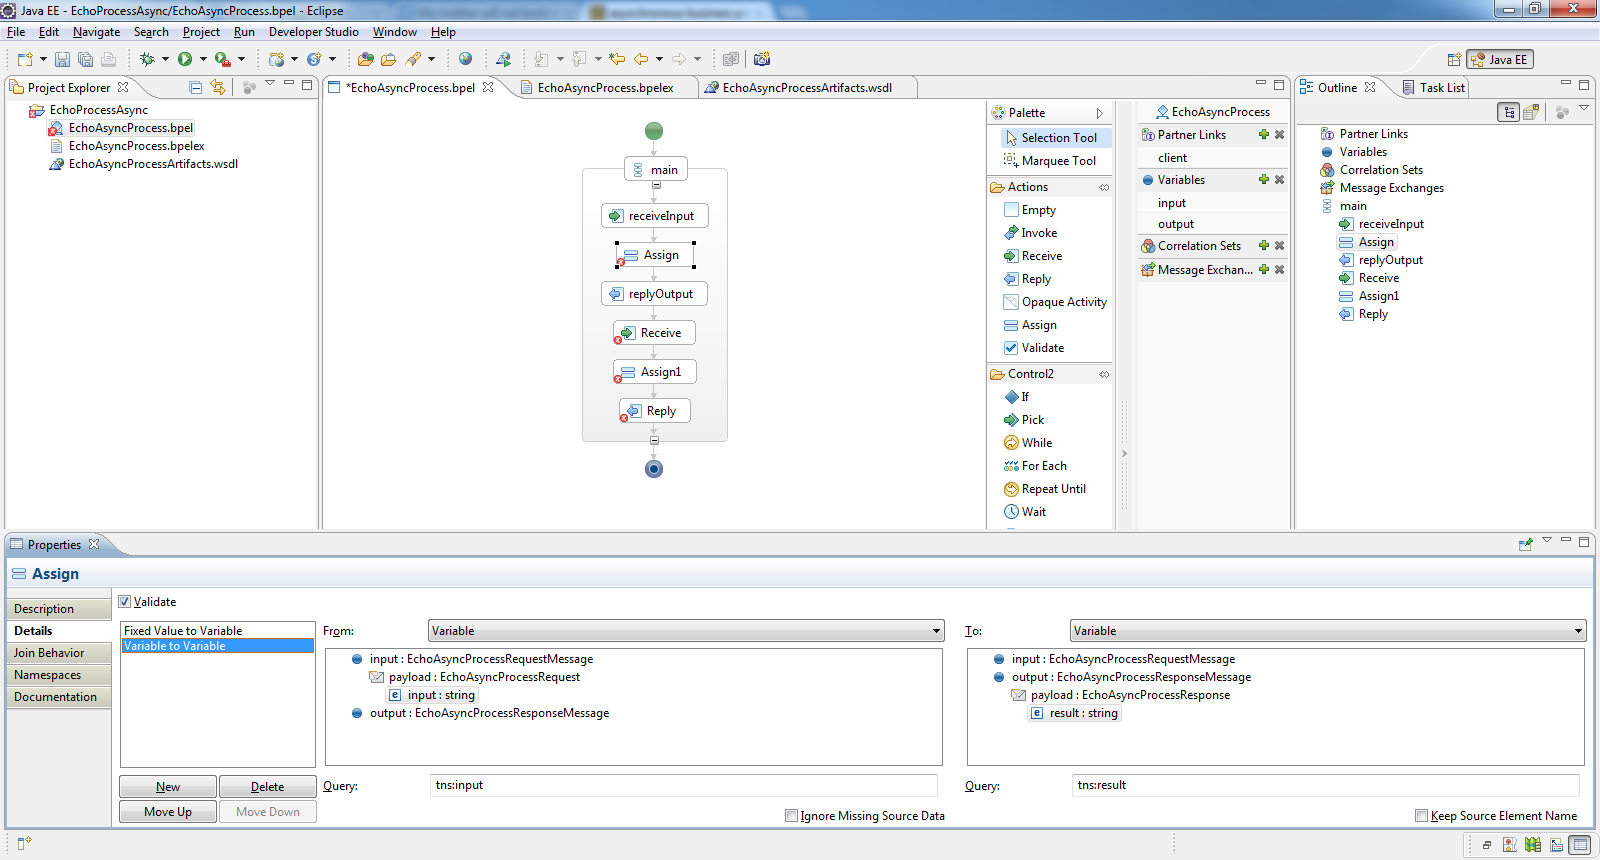
- Click on the Assign activity and assign ‘input’ from the input variable to ‘result’ from the output variable.
- Similarly, complete the next Receive, Assign and Reply activity by using the same partner link ‘client’. Now you have completed the process logic. Next you need to add the correlation set to two Receive activities.
- Create a correlation set by clicking on the ‘+’ sign next to Correlation Sets.
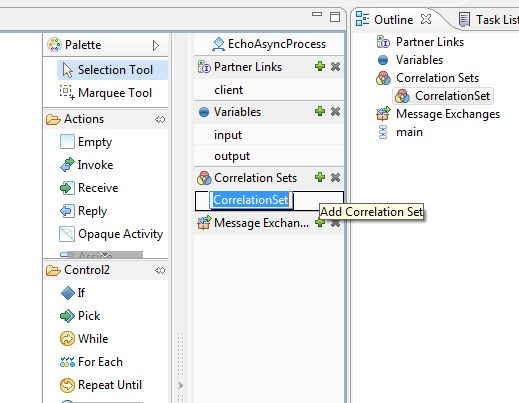
- Select the correlation set and select Properties and click Add.
- You see the Select a Property wizard. Click New.

- Give a Name to our correlation property and select Simple Type under the Defined As section.
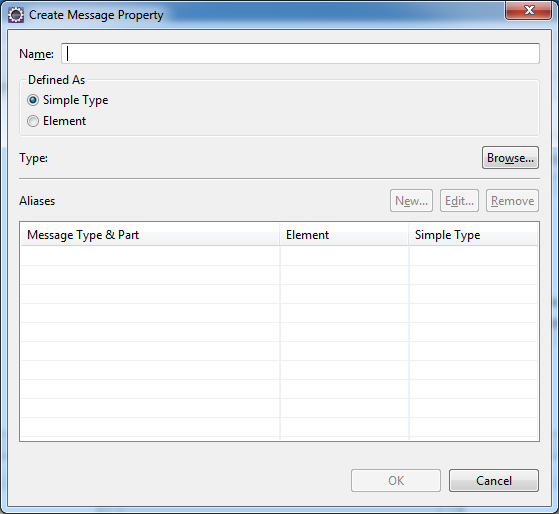
- Select the data type for our correlation property. In this instance, you have selected a ‘Simple Type’.
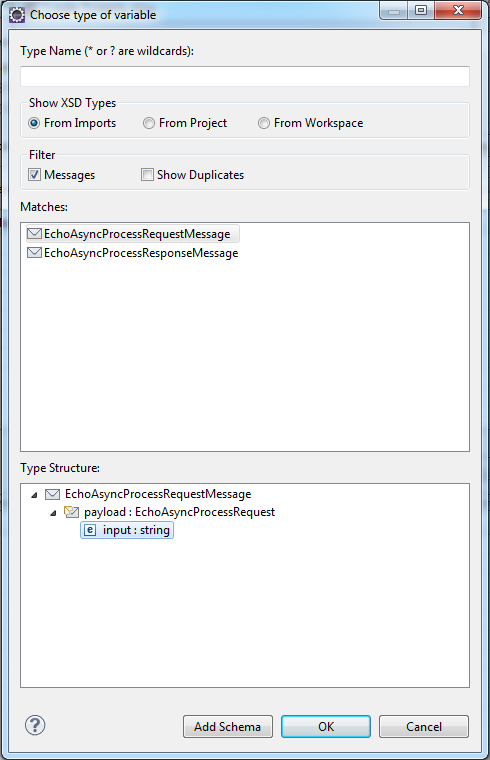
- Click Browse. Now we have to select the data type from XML schema types. Select string as our type.
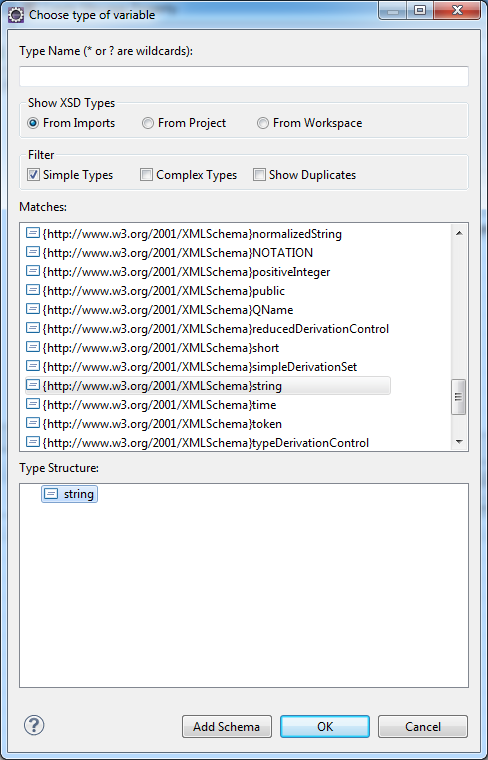
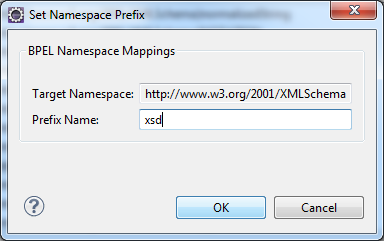
- Click OK. Now a pop up box appears and asks for the prefix to be used to the XML schema namespace. Enter the prefix as ‘xsd’.
- Click on the New button next to Alias to define the property alias. The Create Property Alias window appears.
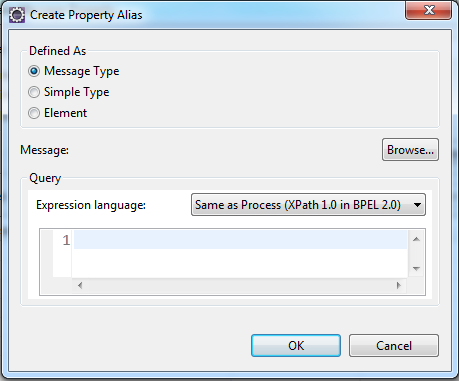
- Select Message Type from the available options.
- Click on Browse. Also select input string for query.
- Click OK and finish the process.
Now you have finished defining the correlation set, property and alias.
Note that you selected only one alias here because you are using the same message for both receive activities.
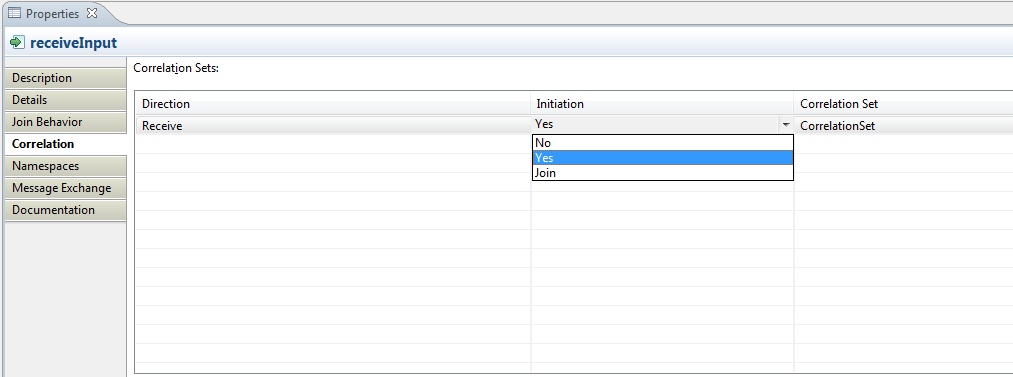
Now we have to add the correlation set to the receive activities. On the first Receive activity, which creates the process instance, initialize the correlation set. On the next, Receive activity; it is not necessary to initialize the correlation set. Click on the Receive activity, and go to Properties, click Add and select the correlation set. Since there is only one correlation set, it is the only one that appears. On the Initiation section select Yes.
- On the next correlation activity, set Initiation to No.
- Next, generate the deployment descriptor.
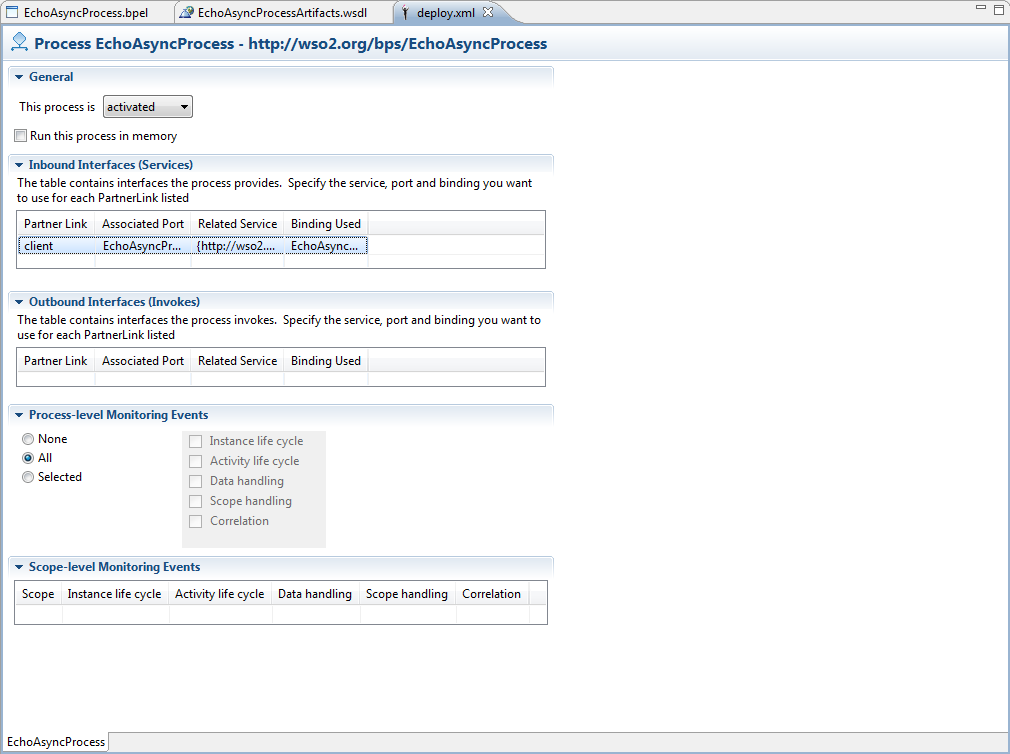
- Next select all files related to the project and create a ZIP package. Upload the BPEL package. Once the process is deployed successfully; we can use tryit to send a request to the process.
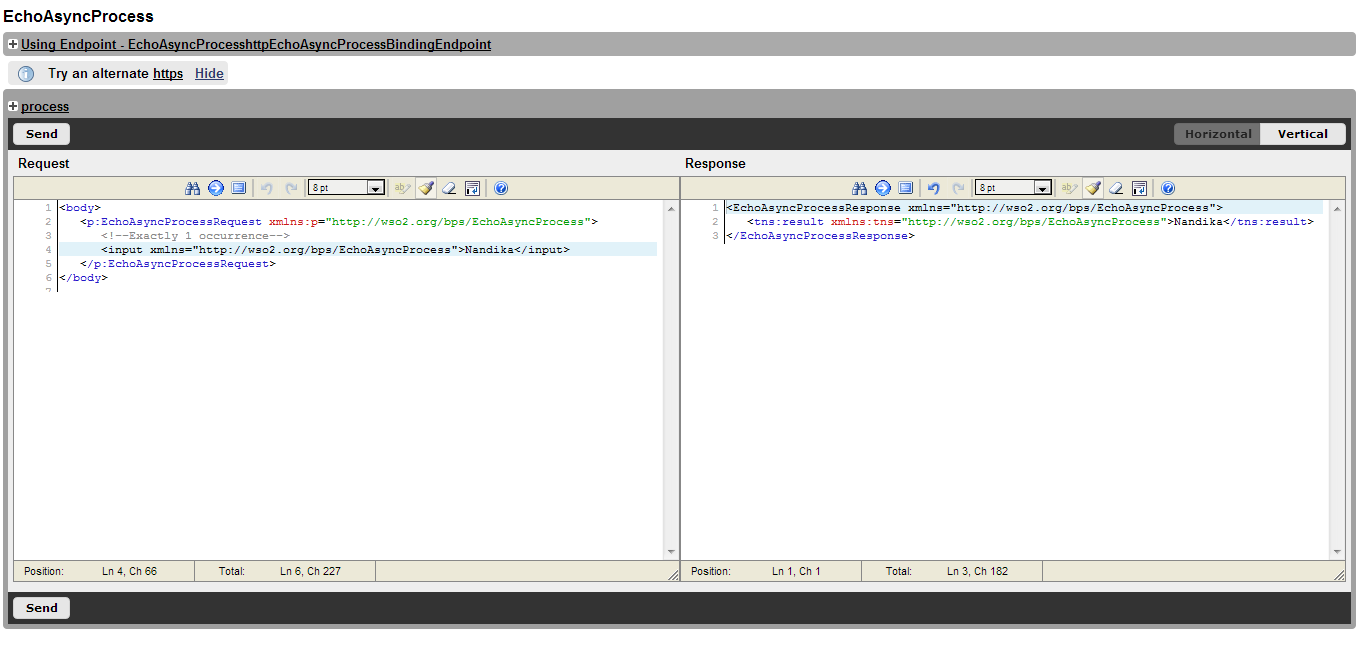
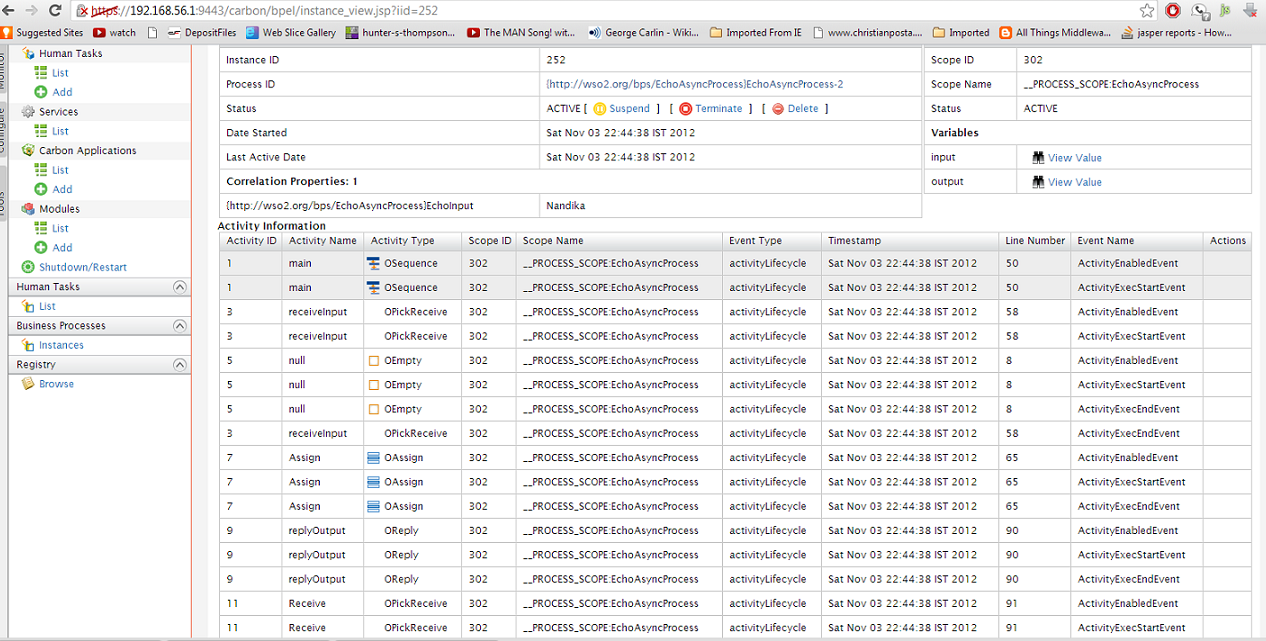
- Now navigate to the instance view for this process. The instance has completed up to the Reply activity and is waiting on the next Receive activity. Under the correlation properties; you can see the value sent in the request.
- Now send the same request from tryit again. The process instance has gone to the completed state. You can follow the same steps used here to add correlation sets to any asynchronous business process you implement. Correlation sets can be added to ‘receive’, ‘invoke’ and ‘pick’ activities.