This site contains the documentation that is relevant to older WSO2 product versions and offerings.
For the latest WSO2 documentation, go to https://wso2.com/documentation/.
Configuring Duo Security Provisioning Connector
This topic provides instructions on how to configure the Duo app and how to provision the users from WSO2 Identity Server. See the following sections for more information.
This is tested for the Duo Security API version V2.
Configuring the Duo Security app
- Go to https://duo.com and click free signup and register.
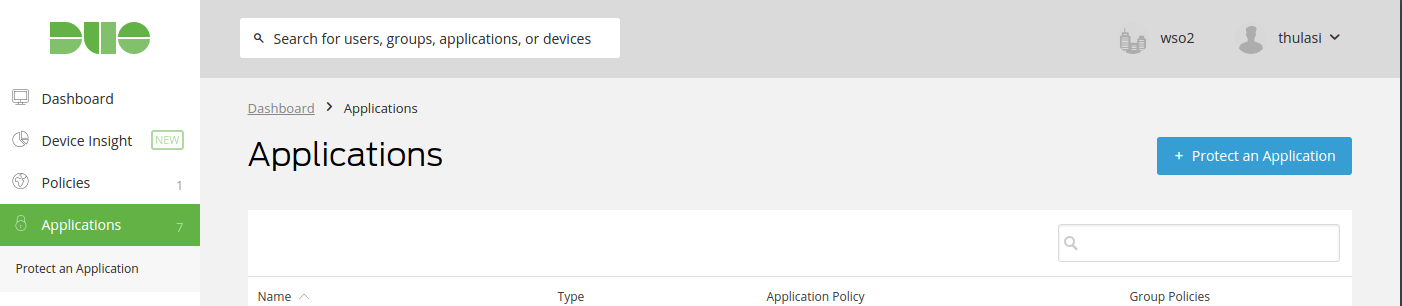
- Log in to Duo Security. Click Applications from the left panel and click the Protect an Application button.
In the Protect an Application page, select Admin API from the list.
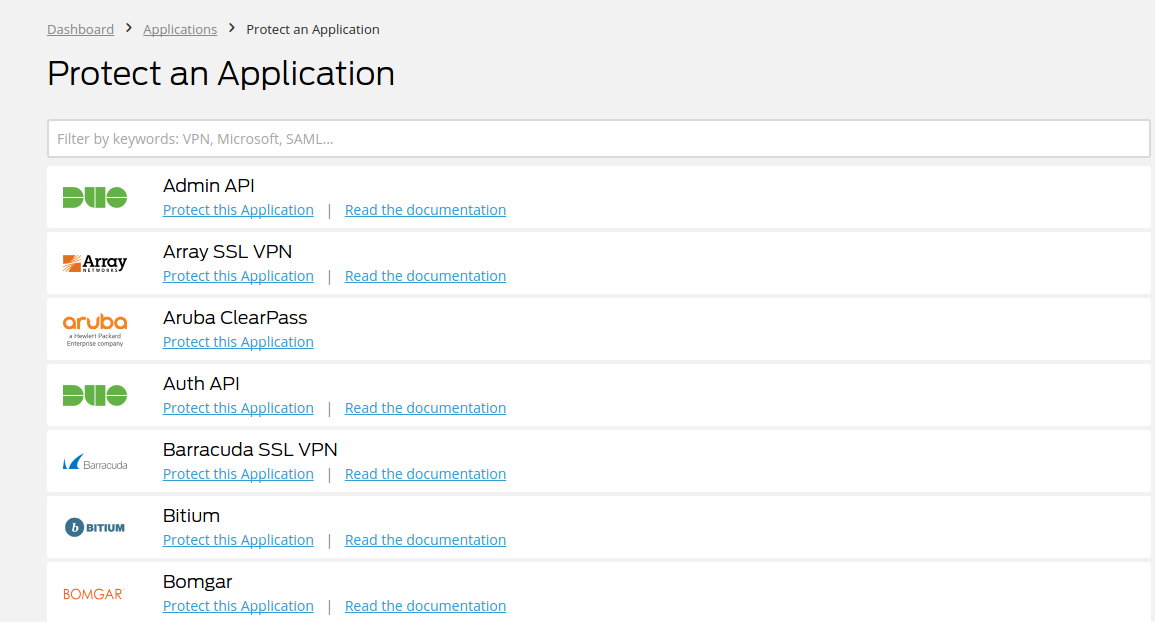
Important : If you can not see the type “Admin API” in the dropdown, contact the Duo team through support@duosecurity.com and ask for Admin API permission.
- Once the Integration is created, you are given a Secret key and an Integration key for your integration. You can use these along with your Duo host when accessing duo security APIs.
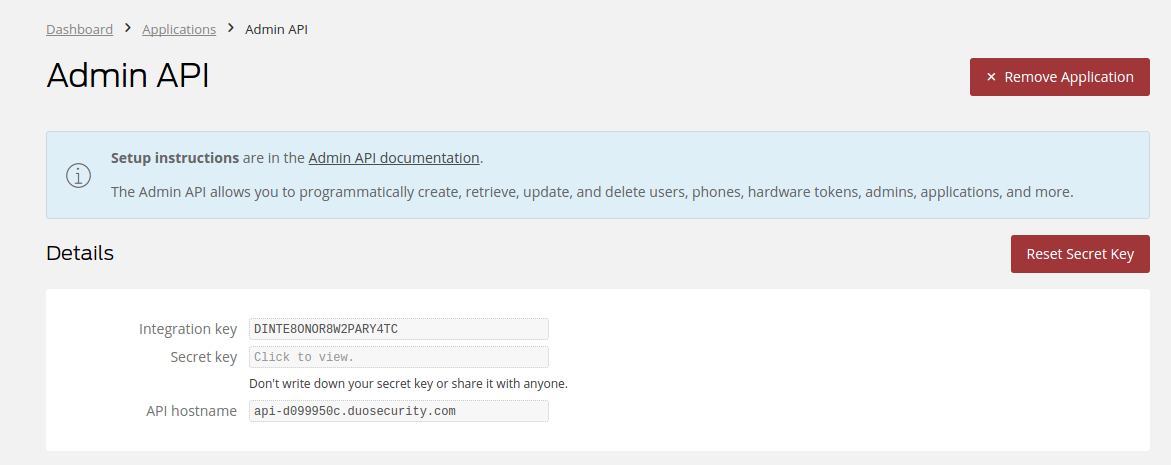
- Make sure to enable "Grant Write Resource" permission to provisioning the users. Check the Admin API application settings in the Duo Admin Panel (Applications > Admin API, scroll down to Settings section > Permissions).
Configuring user claim
- Log into the WSO2 Identity Server Management Console by entering your username and password.
- In the Main menu, click Add under Claims.
- Click Add New Claim.
- Select the Dialect from the dropdown provided and enter the required information.
- Add the following user claims under ' http://wso2.org/claims' .


Deploying Duo artifacts
To download the authenticator and artifacts, go to the WSO2 store.
Place the provisioning connector .jar file (org.wso2.carbon.extension.identity.provisioning.connector.duo-1.x.x
.jar) into the<IS_HOME>/repository/components/dropinsdirectory.If you want to upgrade the Duo Provisioning Authenticator in your existing IS pack, please refer upgrade instructions.
- Place the
okio-1.9.0.jarinto the<IS_HOME>/repository/components/libdirectory.
Configuring the identity provider
Now you have to configure WSO2 Identity Server by adding a new identity provider.
- Log in to the management console as an administrator.
- In the Main menu, click Add under Identity Providers.
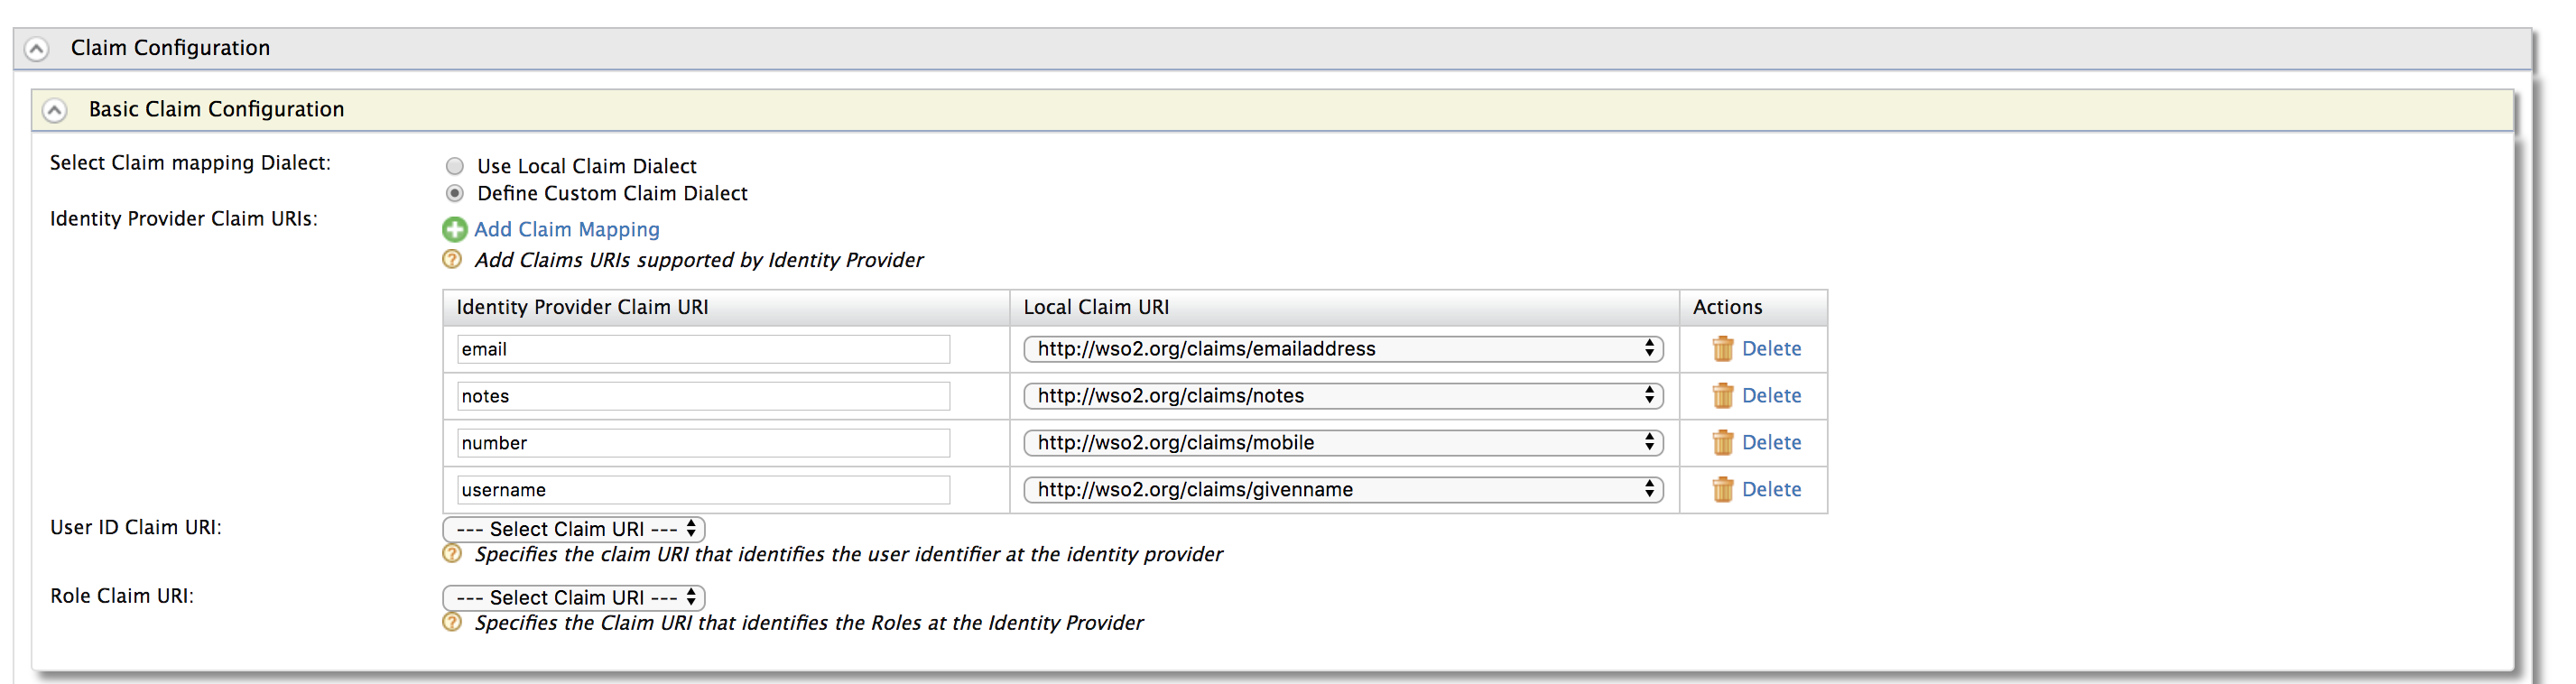
- Expand the Claim Configuration section and select Define Custom Claim Dialect under Basic Claim Configuration section.
- Click Add Claim Mapping and add the following claims.
- Go to Duo Provisioning Configuration under Outbound Provisioning Connectors. Give a suitable name as the Identity Provider Name and fill out the fields.
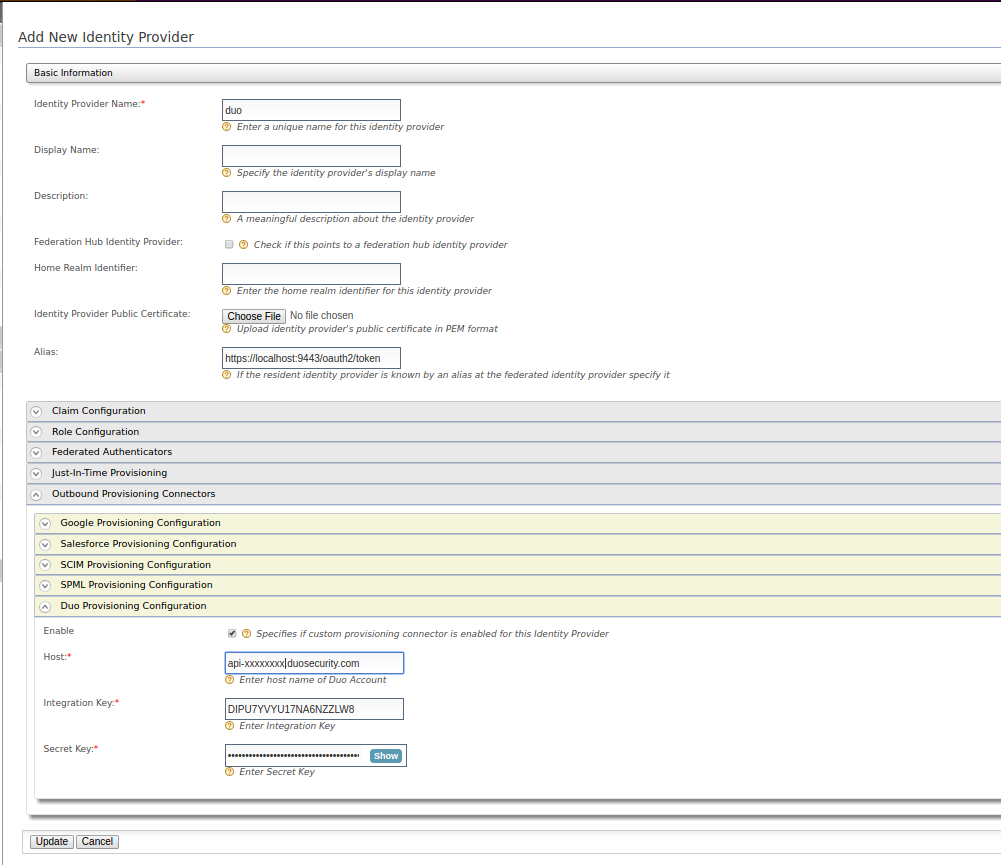
Enter the values for the required fields. You should use Integration key, Secret key and Host values of the Duo app that you created.
Click Register.
You have now added the identity provider.
Configuring the resident service provider
The next step is to configure the service provider.
Return to the management console.
- In the Main menu, click Add under Service Providers.
Select Resident Service Provider in the Service Providers page and add the created Duo identity provider in the Outbound Provisioning Configuration as indicated in the figure below.

Click Update to save the changes.
You have now added and configured the service provider.
Testing the provisioning connector
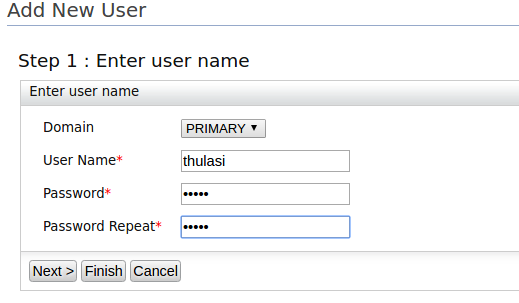
In the Main menu, click Add under Users and Roles and create a new user.
Enter the User Name and Password for the new user and click Finish.
Go to https://admin-xxxxxxxx.duosecurity.com/users and check the newly created user.
