The content in this documentation is for older versions of WSO2 products. For updated information on Enterprise Integration Patterns, go to the latest Micro Integrator documentation.
Request-Reply
This section explains, through an example scenario, how the Request-Reply Message EIP can be implemented using WSO2 ESB. The following topics are covered:
Introduction to Request-Reply
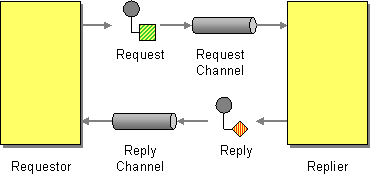
The Request-Reply EIP facilitates two-way communication by ensuring that a sender gets a response or reply back from the receiver after sending a request message. This pattern sends a pair of Request-Reply messages, each on its own channel. For more information, refer to http://www.eaipatterns.com/RequestReply.html.
Figure 1: Request-Reply EIP
Example scenario
The example scenario illustrates how a request to a service is made through one channel, and the response from the service is returned to the requester on a separate channel.
The diagram below depicts how to simulate the example scenario using the WSO2 ESB.
Figure 2: Example Scenario of the Request-Reply EIP
Before digging into implementation details, let's take a look at the relationship between the example scenario and the Request-Reply EIP by comparing their core components.
| Request-Reply EIP (Figure 1) | Request-Reply Example Scenario (Figure 2) |
|---|---|
| Requestor | Simple Stock Quote Client |
| Request Channel | Send, Endpoint |
| Replier | Stock Quote Service Instance |
| Reply Channel | Send, Endpoint |
Environment setup
- Download and install WSO2 ESB from http://wso2.com/products/enterprise-service-bus. For a list of prerequisites and step-by-step installation instructions, refer to Installation Guide in the WSO2 ESB documentation.
- Start the sample Axis2 server. For instructions, refer to the section ESB Samples Setup - Starting Sample Back-End Services in the WSO2 ESB documentation.
ESB configuration
Start the ESB server and log into its management console UI (https://localhost:9443/carbon). In the management console, navigate to the Main menu and click Source View in the Service Bus section. Next, copy and paste the following configuration, which helps you explore the example scenario, to the source view.
<?xml version="1.0" encoding="UTF-8"?>
 <definitions xmlns="http://ws.apache.org/ns/synapse">
  <proxy name="ProxyService" transports="http https" startOnLoad="true">
        <target>
           <inSequence>
              <send>
                 <endpoint>
                    <address uri="http://localhost:9000/services/SimpleStockQuoteService"/>
                 </endpoint>
              </send>
           </inSequence>
           <outSequence>
              <send/>
           </outSequence>
        </target>
     </proxy>
 </definitions>
Simulating the sample scenario
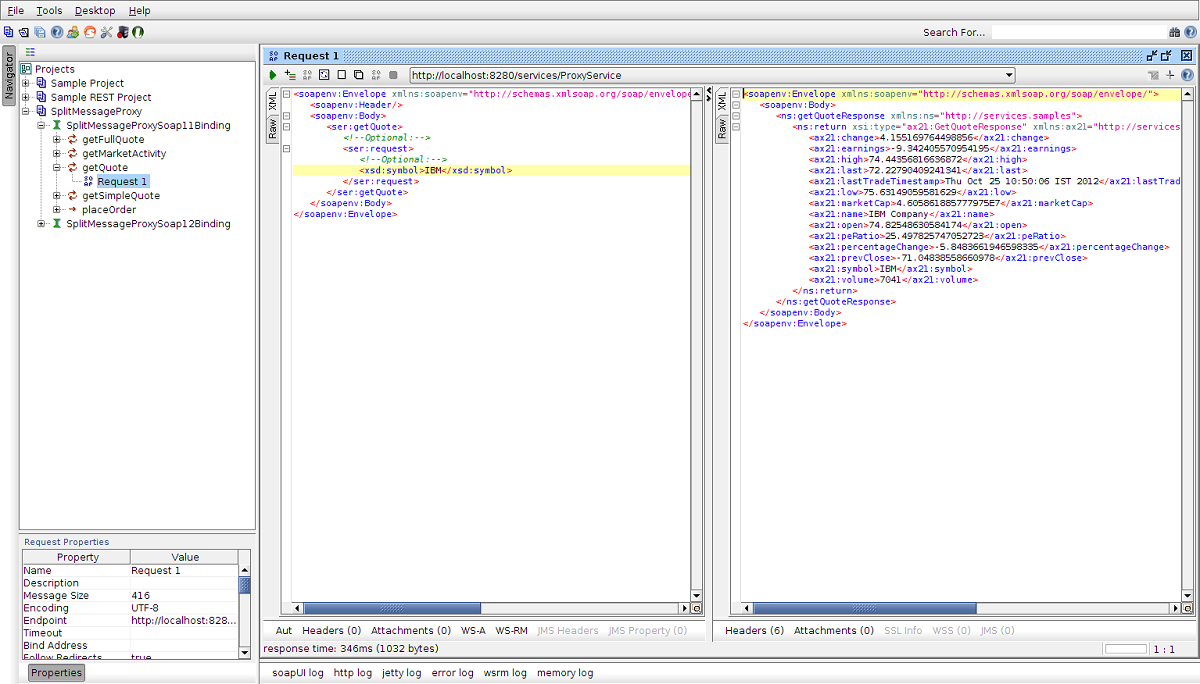
Use a SOAP client like SoapUI to invoke the above proxy service. The following image illustrates how a response is generated to a request made by the client.
How the implementation works
Let's investigate the elements of the ESB configuration in detail. The line numbers below are mapped with the ESB configuration shown above.
- inSequence [line 5 in ESB config] - When a client sends a message, it is picked up by the
inSequence. - send [line 6 in ESB config] - The
sendmediator sends the message to the endpoint running on port 9000. - outSequence [line 12 in ESB config] - The processed response from the endpoint will be sent back to the client through the
outSequence. Thesendmediator inside theoutSequencewill direct the message back to the requesting client, which is on a channel separate from the requesting channel.


